In this tutorial, we will learn how to deploy a Hugo blog to Google Cloud Storage. And create a load balancer to serve the static content.
Let’s first start with the dummy way to deploy the Hugo blog to Google Cloud Storage. After that, we will use the Google Cloud Build to automate the deployment process.
Let’s get started!
Prerequisites
- A Hugo site
- Google Cloud account
- Google Cloud SDK
TL;DR
- Install Hugo: Follow the Hugo installation guide.
- Create a new site: Run
hugo new site myblog. - Add a theme: Choose a theme from the Hugo themes and add it to your site (I used PaperMod).
- Install the Google Cloud SDK: Follow the installation guide.
- Authenticate: Run
gcloud auth login. - Create a bucket: Run
gsutil mb gs://your-bucket-name. - Update the hugo config file: Add the following configuration to your
hugo.yamlfile:
deployment:
  targets:
    - name: gcs
      url: gs://your-bucket-name
- Deploy your site: Run
hugo deploy --target=gcs. - Make the bucket public: Run
gsutil iam ch allUsers:objectViewer gs://your-bucket-name. - Register a domain: Register a domain name with a domain registrar.
- Create a load balancer: Follow the Google Cloud Load Balancer guide.
- Add a A, CNAME record: Add a A, CNAME record to your domain pointing to the load balancer.
- Test your site: Open your browser and navigate to your domain.
Okay, let’s go further the details
I assume you have already set up your Hugo site and have a Google Cloud account. Now, let’s deploy your Hugo site to Google Cloud Storage.
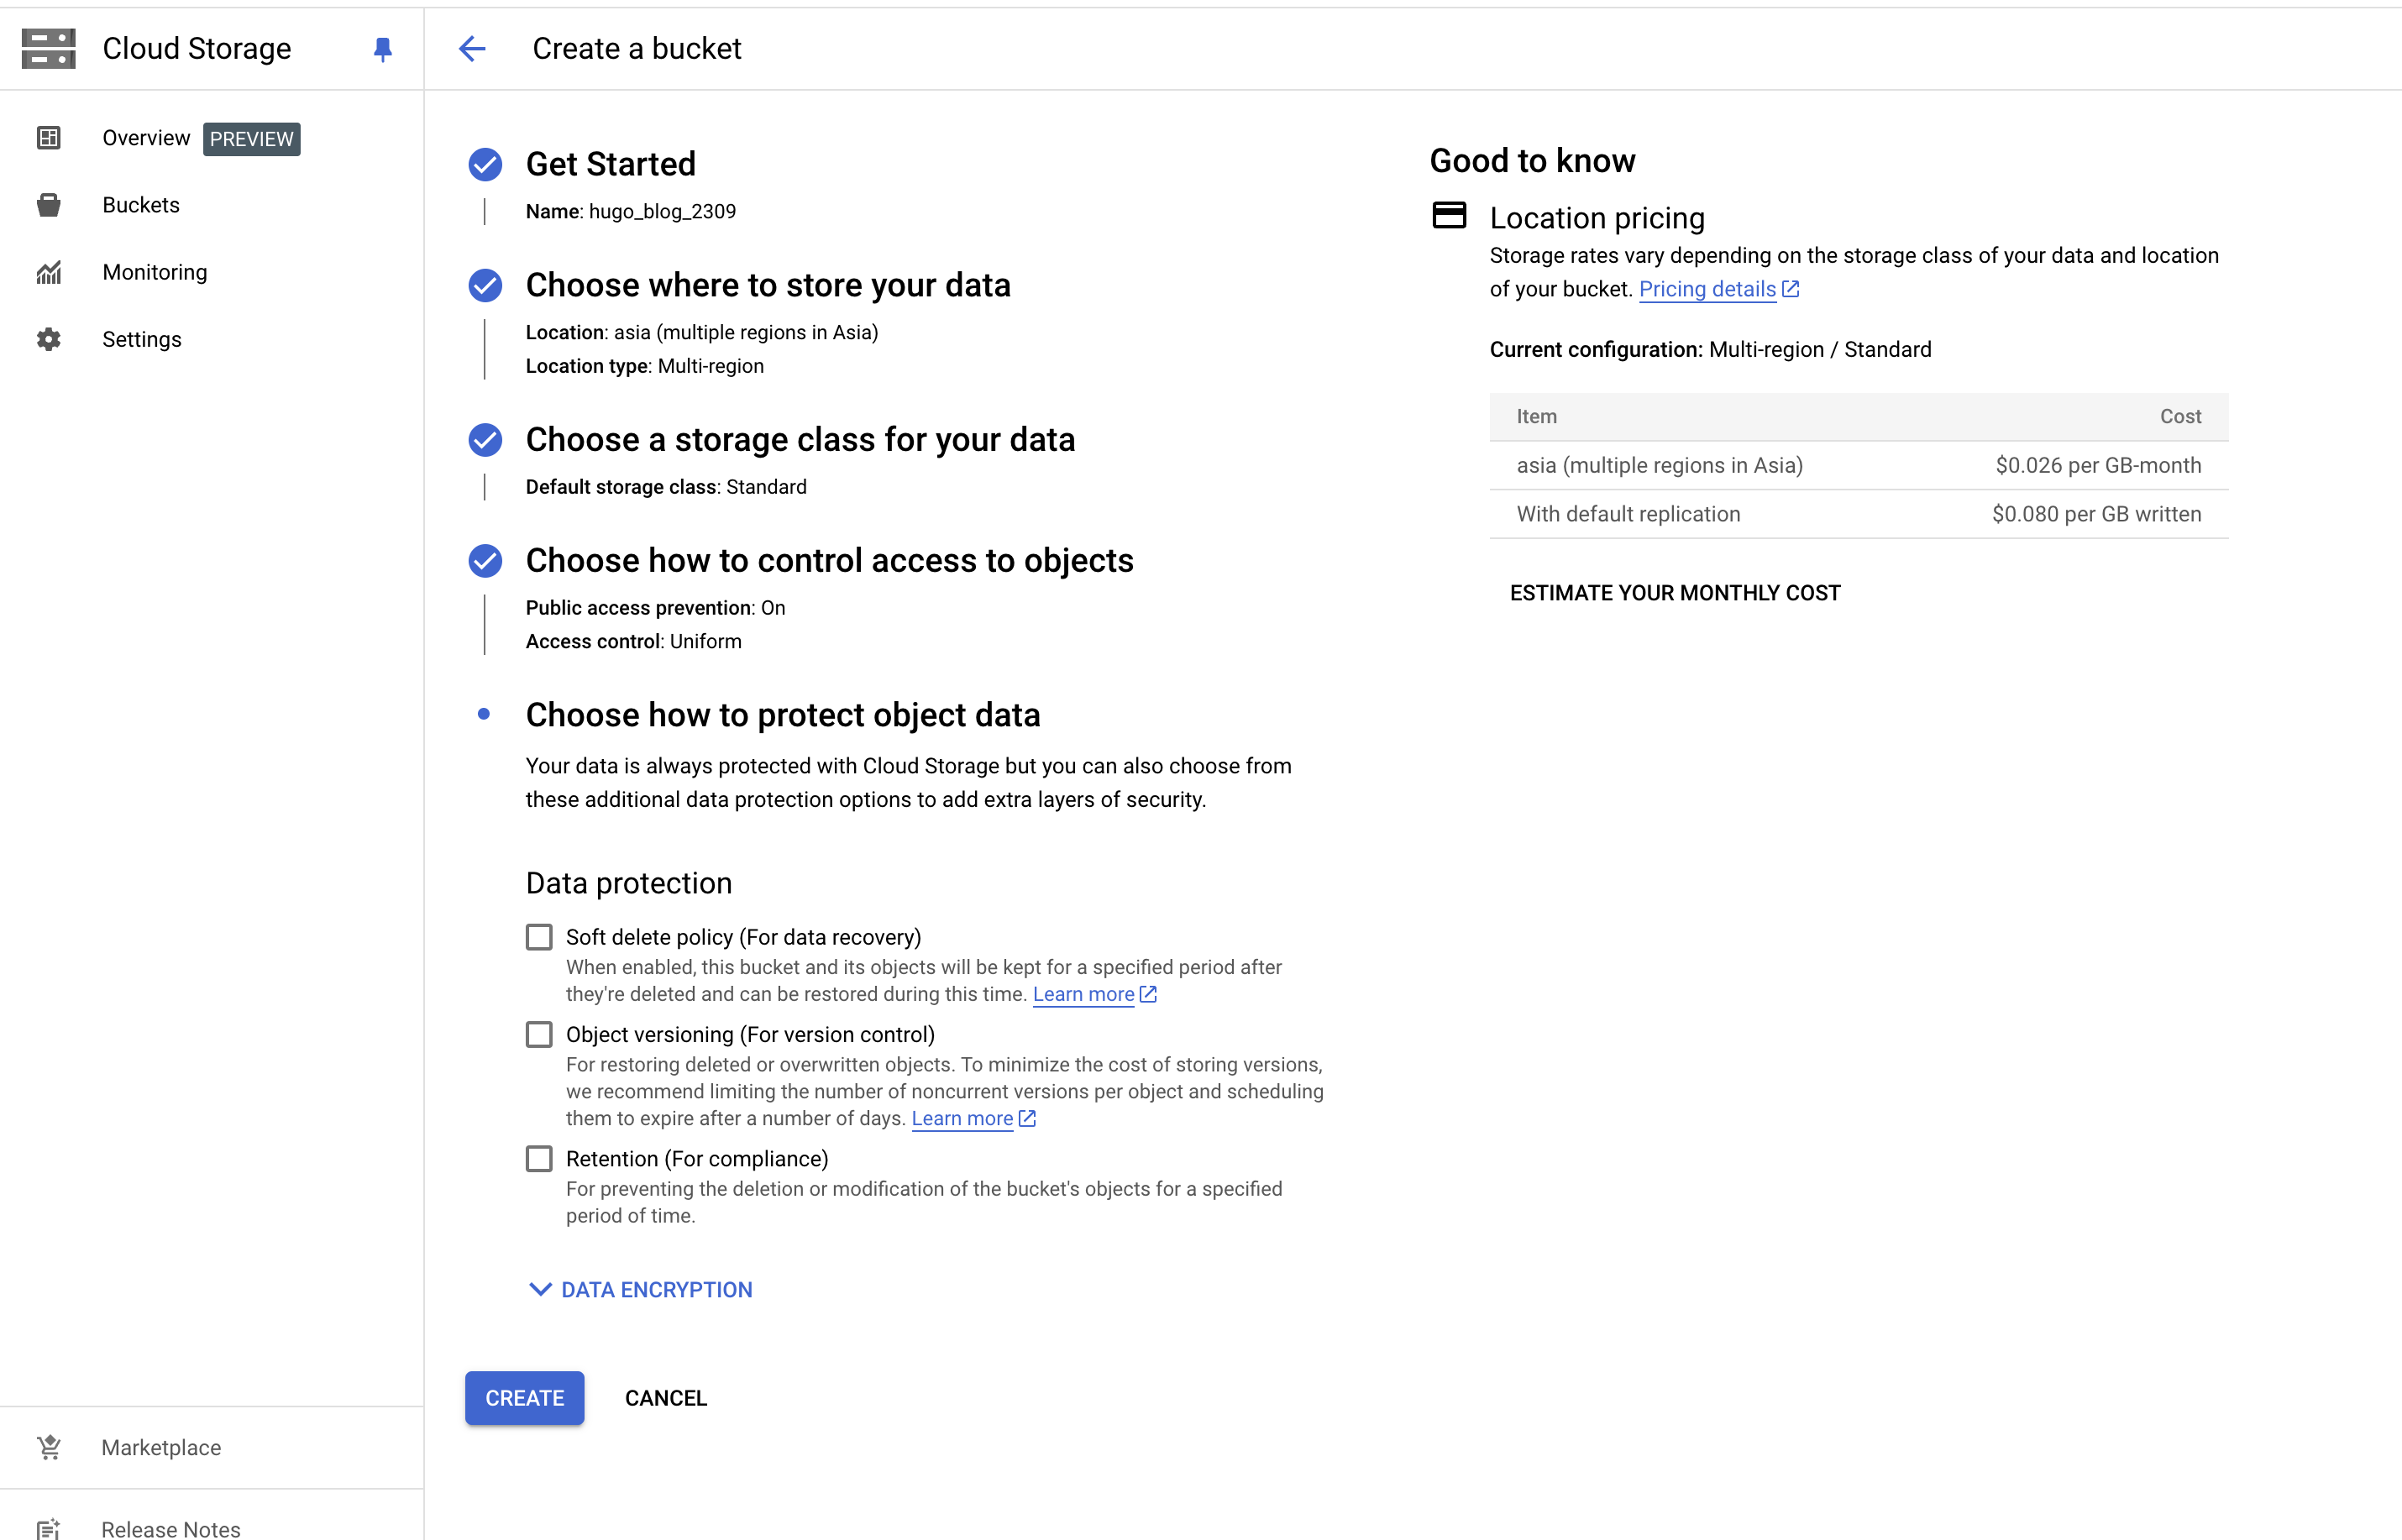
Using Google Cloud Interface to create a bucket
- Go to the Google Cloud Console.
- Click on the hamburger menu in the top left corner.
- Click on “Storage” under the “Storage” section.
- Click on “Create bucket”.
After fill in the bucket name, location, and other settings, click “Create”.
Using Google Cloud SDK to create a bucket
Run the following command to create bucket with the settings:
Storage class: Standard
Location: US
gsutil mb -c standard -l us gs://your-bucket-name
Update the Hugo config file
Add the following configuration to your hugo.yaml file:
deployment:
  targets:
    - name: gcs
      url: gs://your-bucket-name
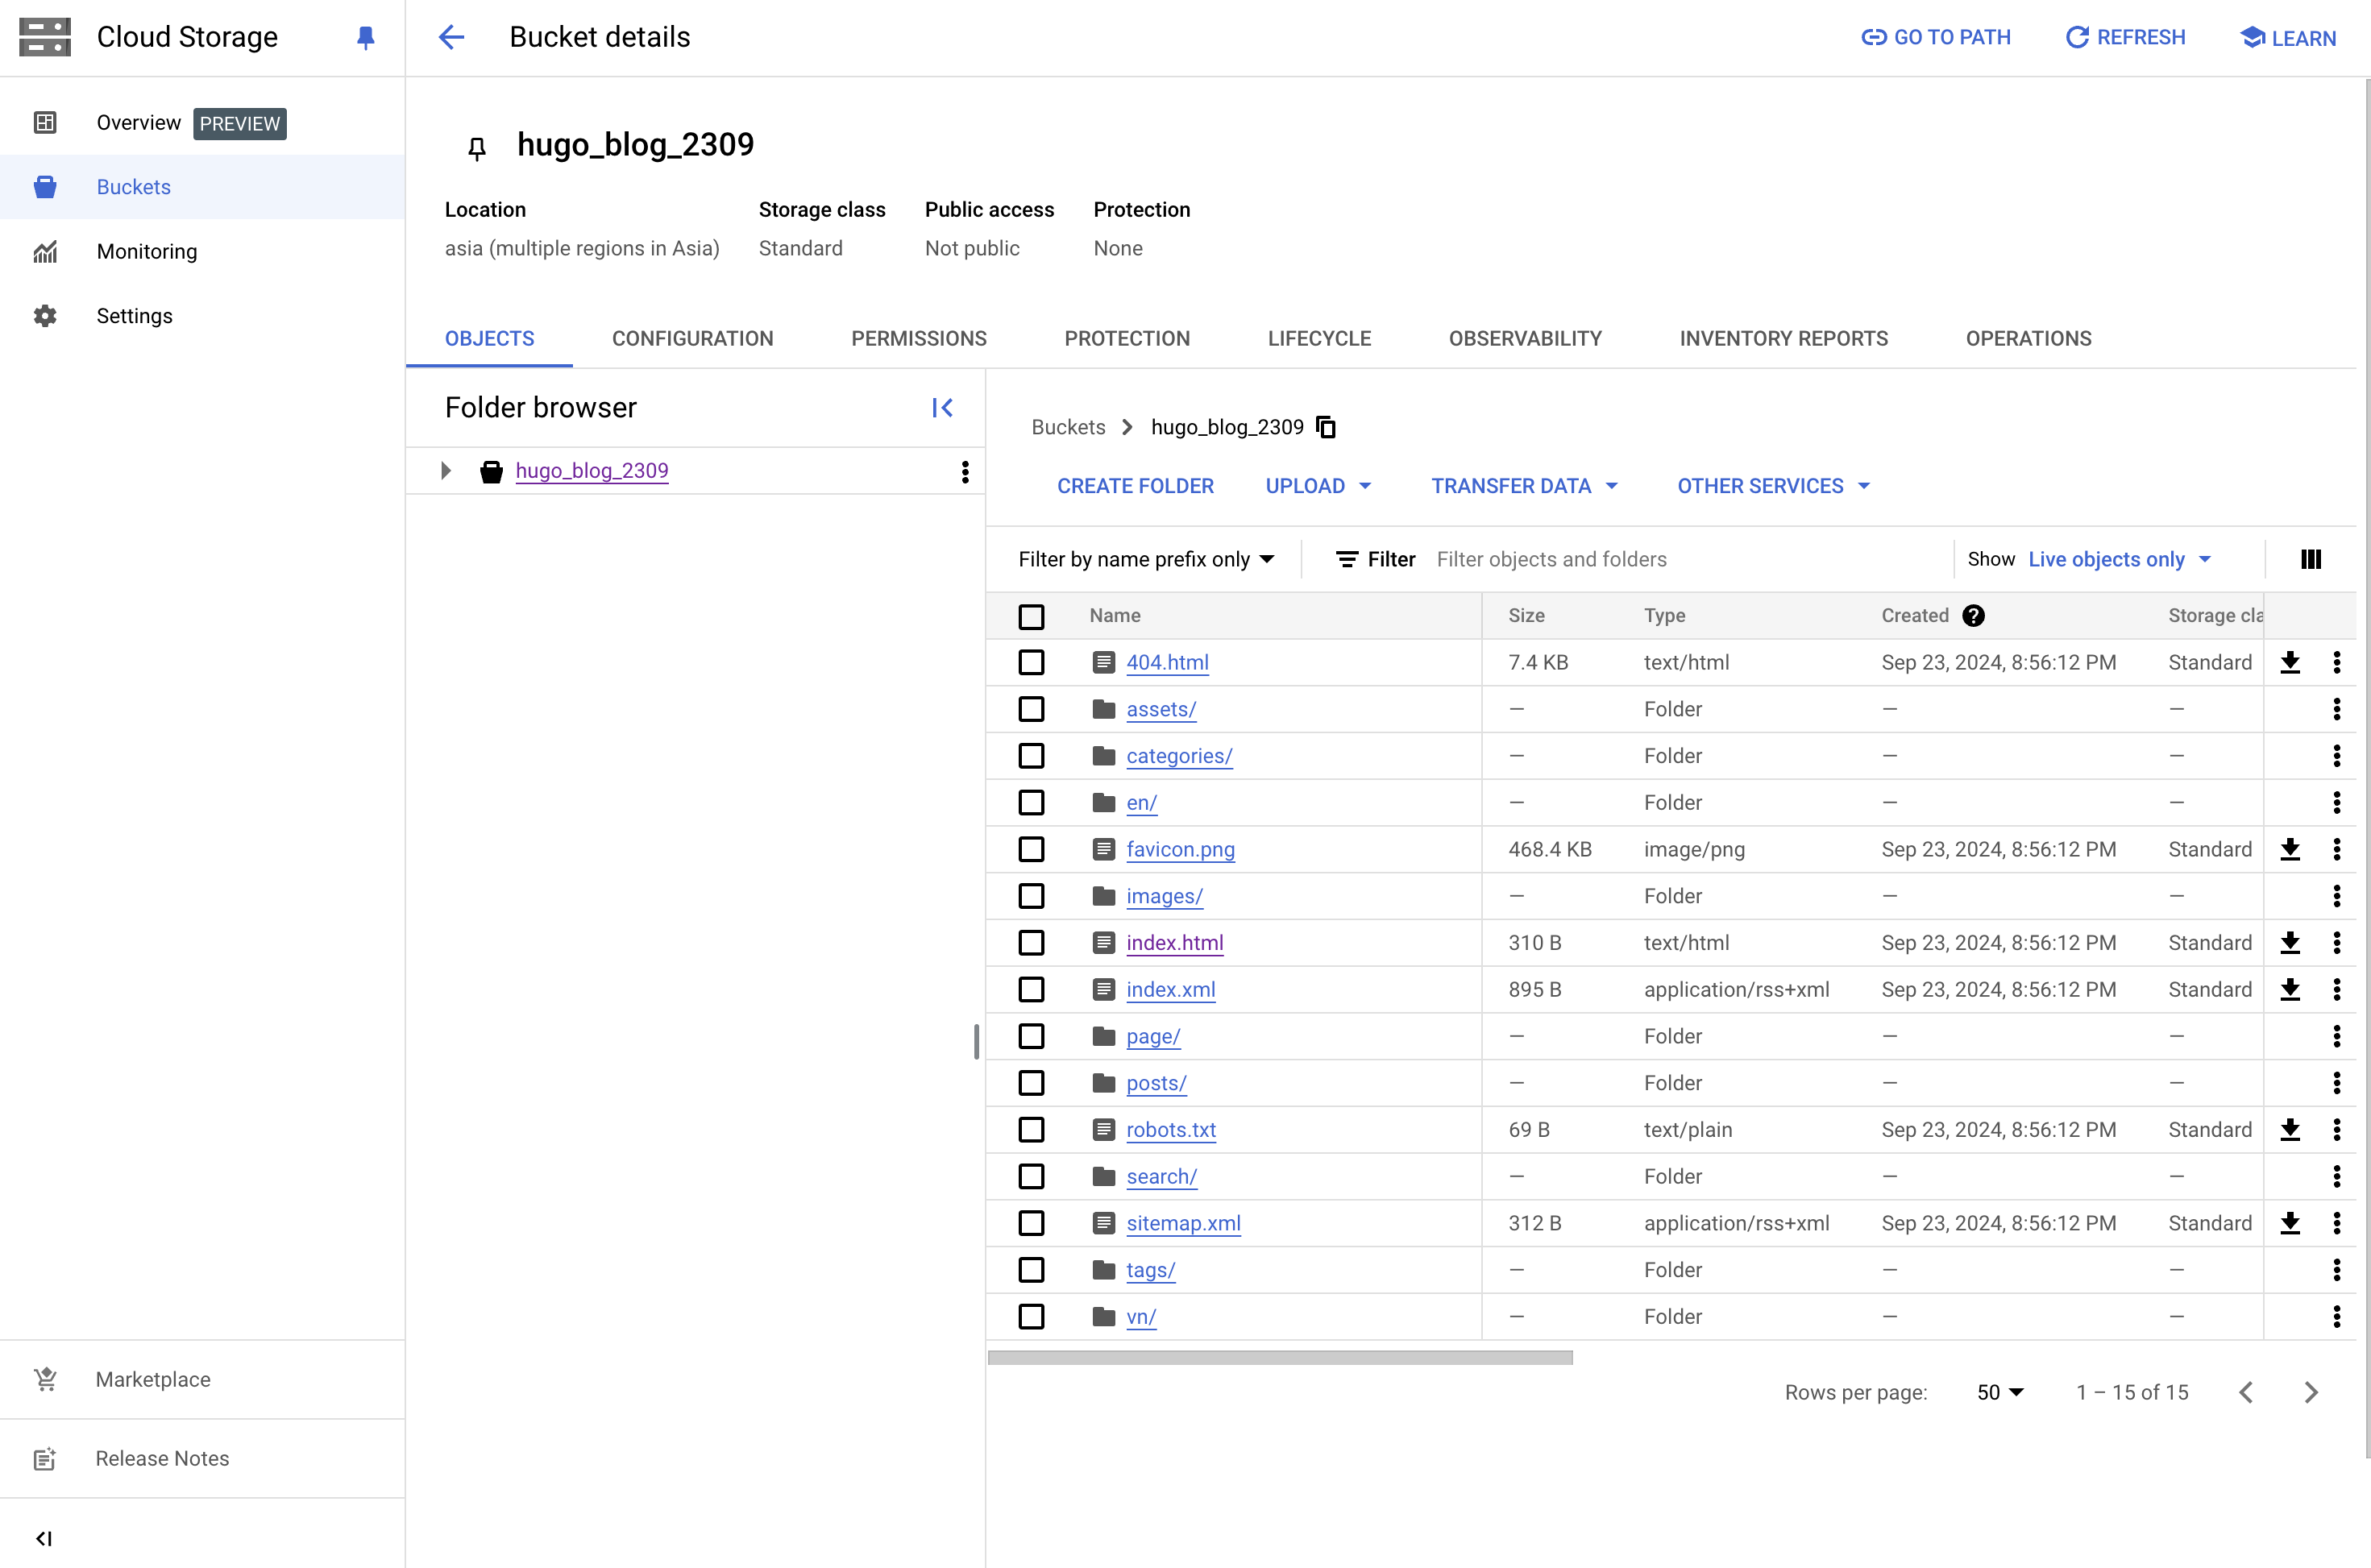
Deploy your site
Run the following command to deploy your site to Google Cloud Storage:
hugo deploy --target=gcs

Make the bucket public
Run the following command to make the bucket public:
gsutil iam ch allUsers:objectViewer gs://your-bucket-name
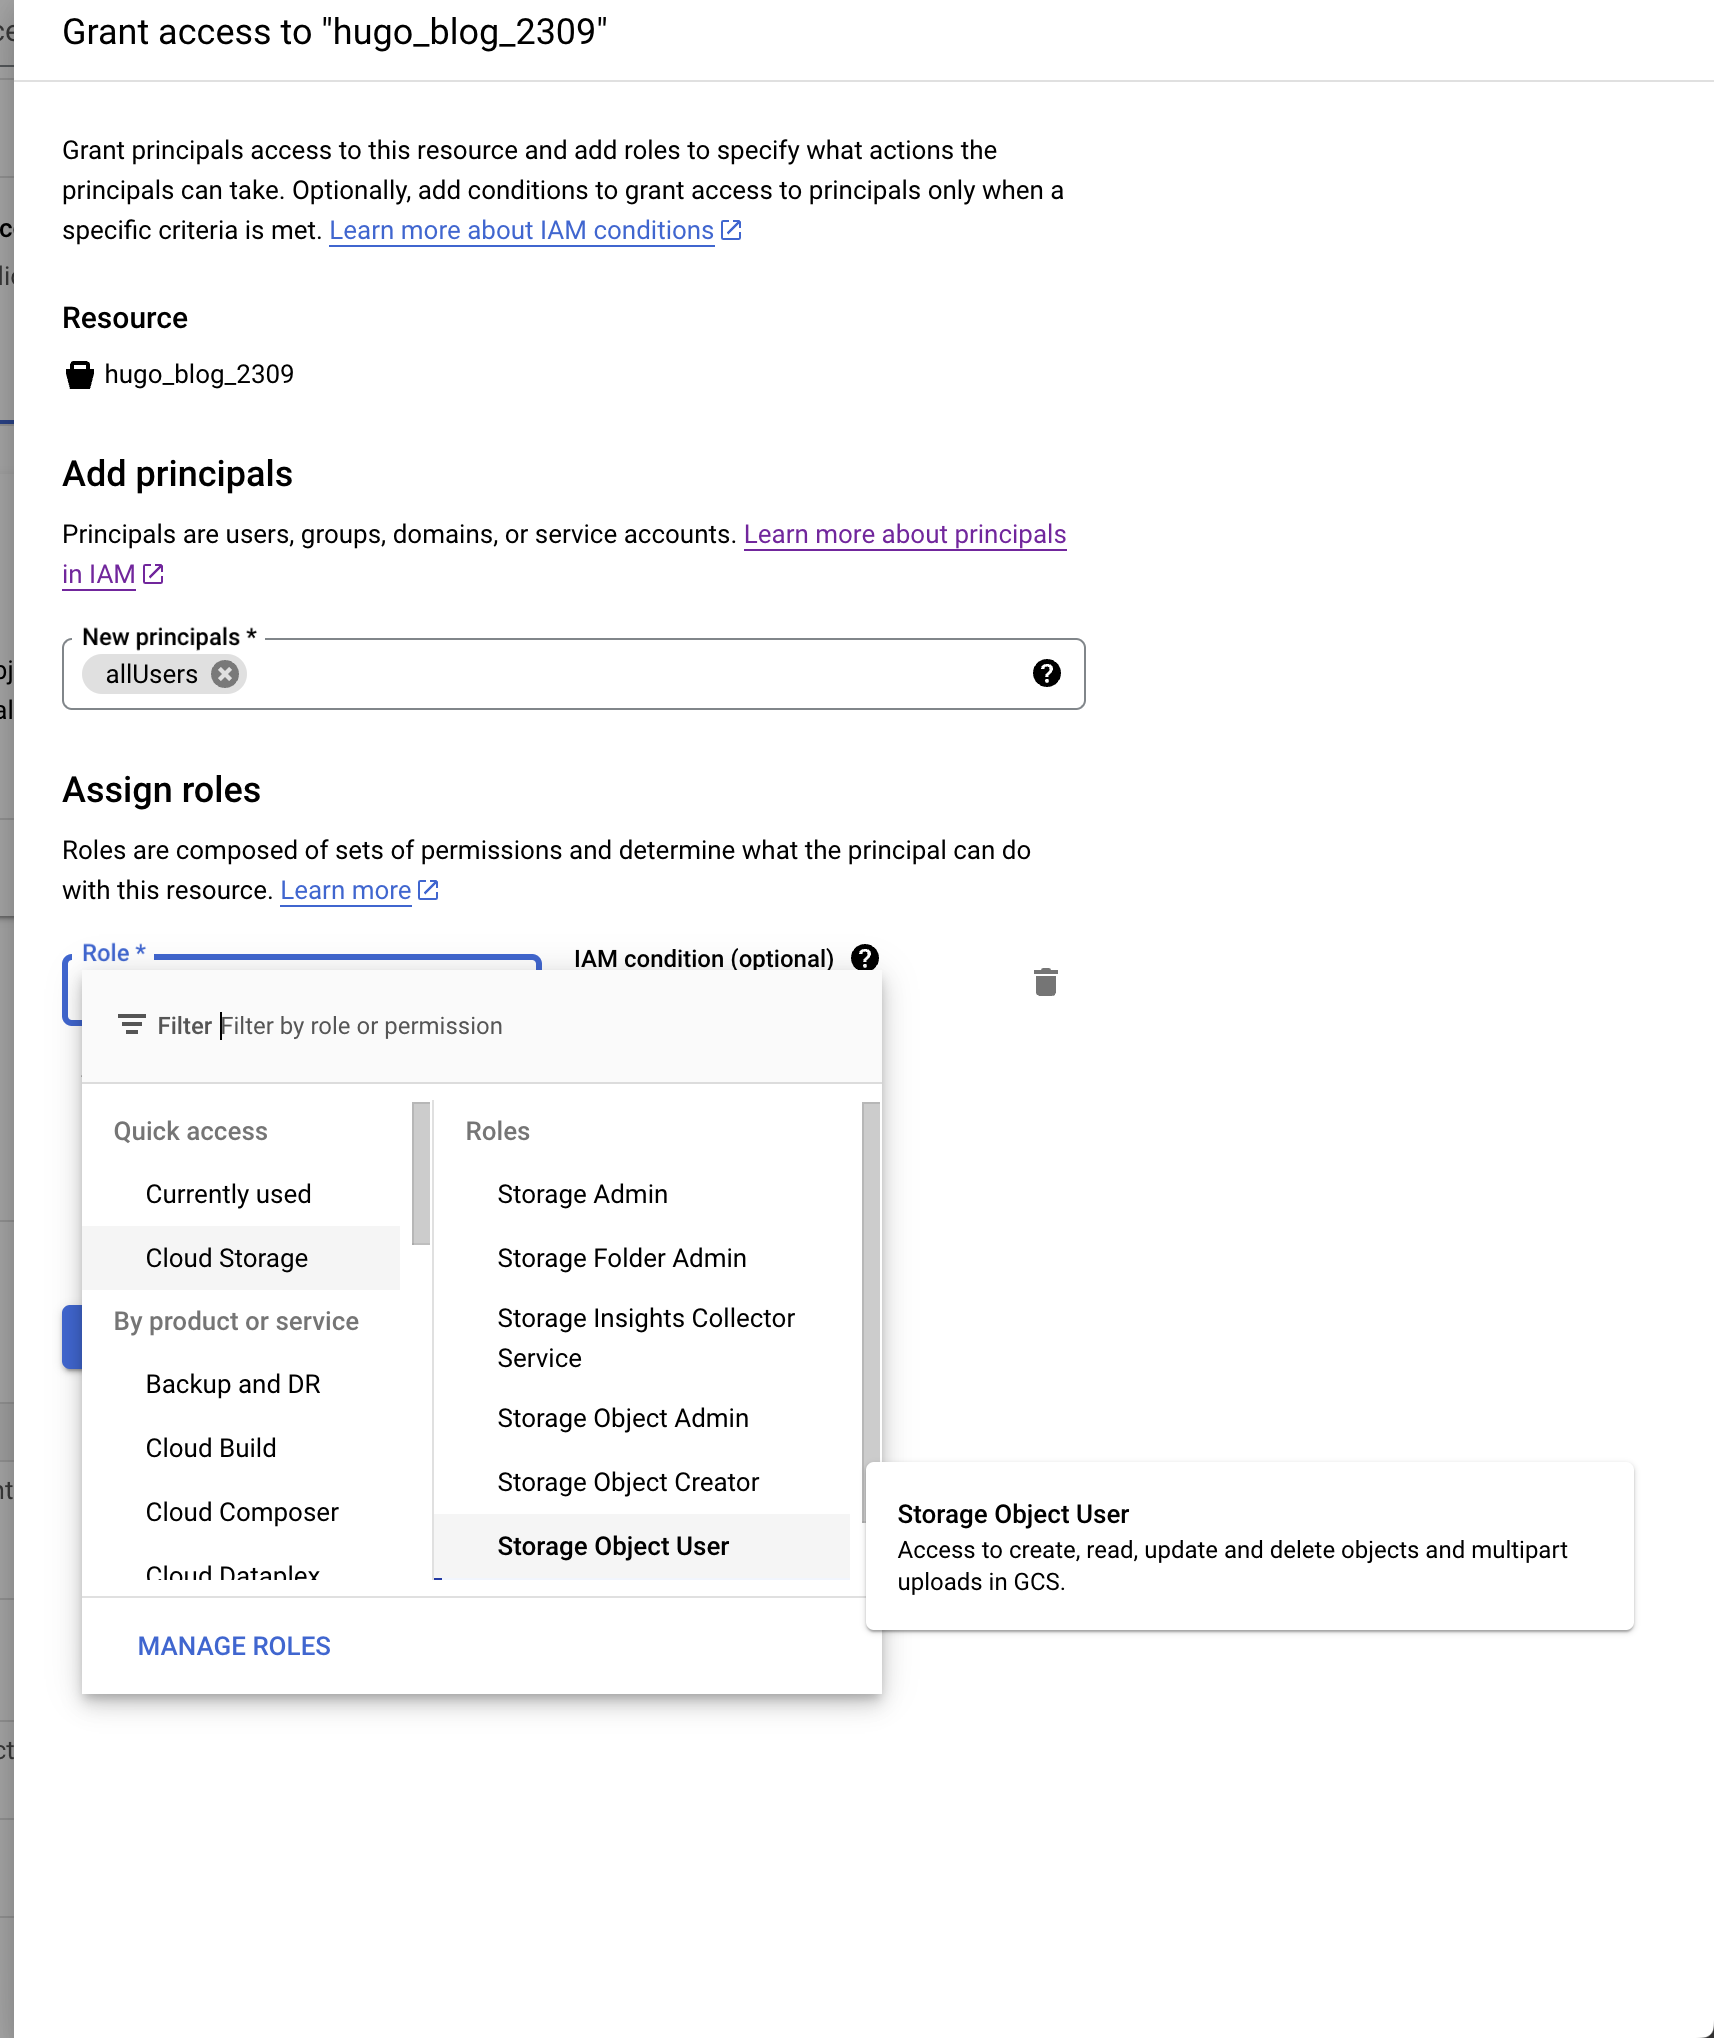
or using the Google Cloud Interface:
- Go to the Google Cloud Console.
- Click on the hamburger menu in the top left corner.
- Click on “Storage” under the “Storage” section.
- Click on the bucket you created.
- Click on the “Permissions” tab.
- Click on “Add members”.
- Add “allUsers” with the role “Storage Object Viewer”.
Register a domain
Register a domain name with a domain registrar. I used cloudflare.com to register my domain.

after inserting personal information and payment, you will get the domain.

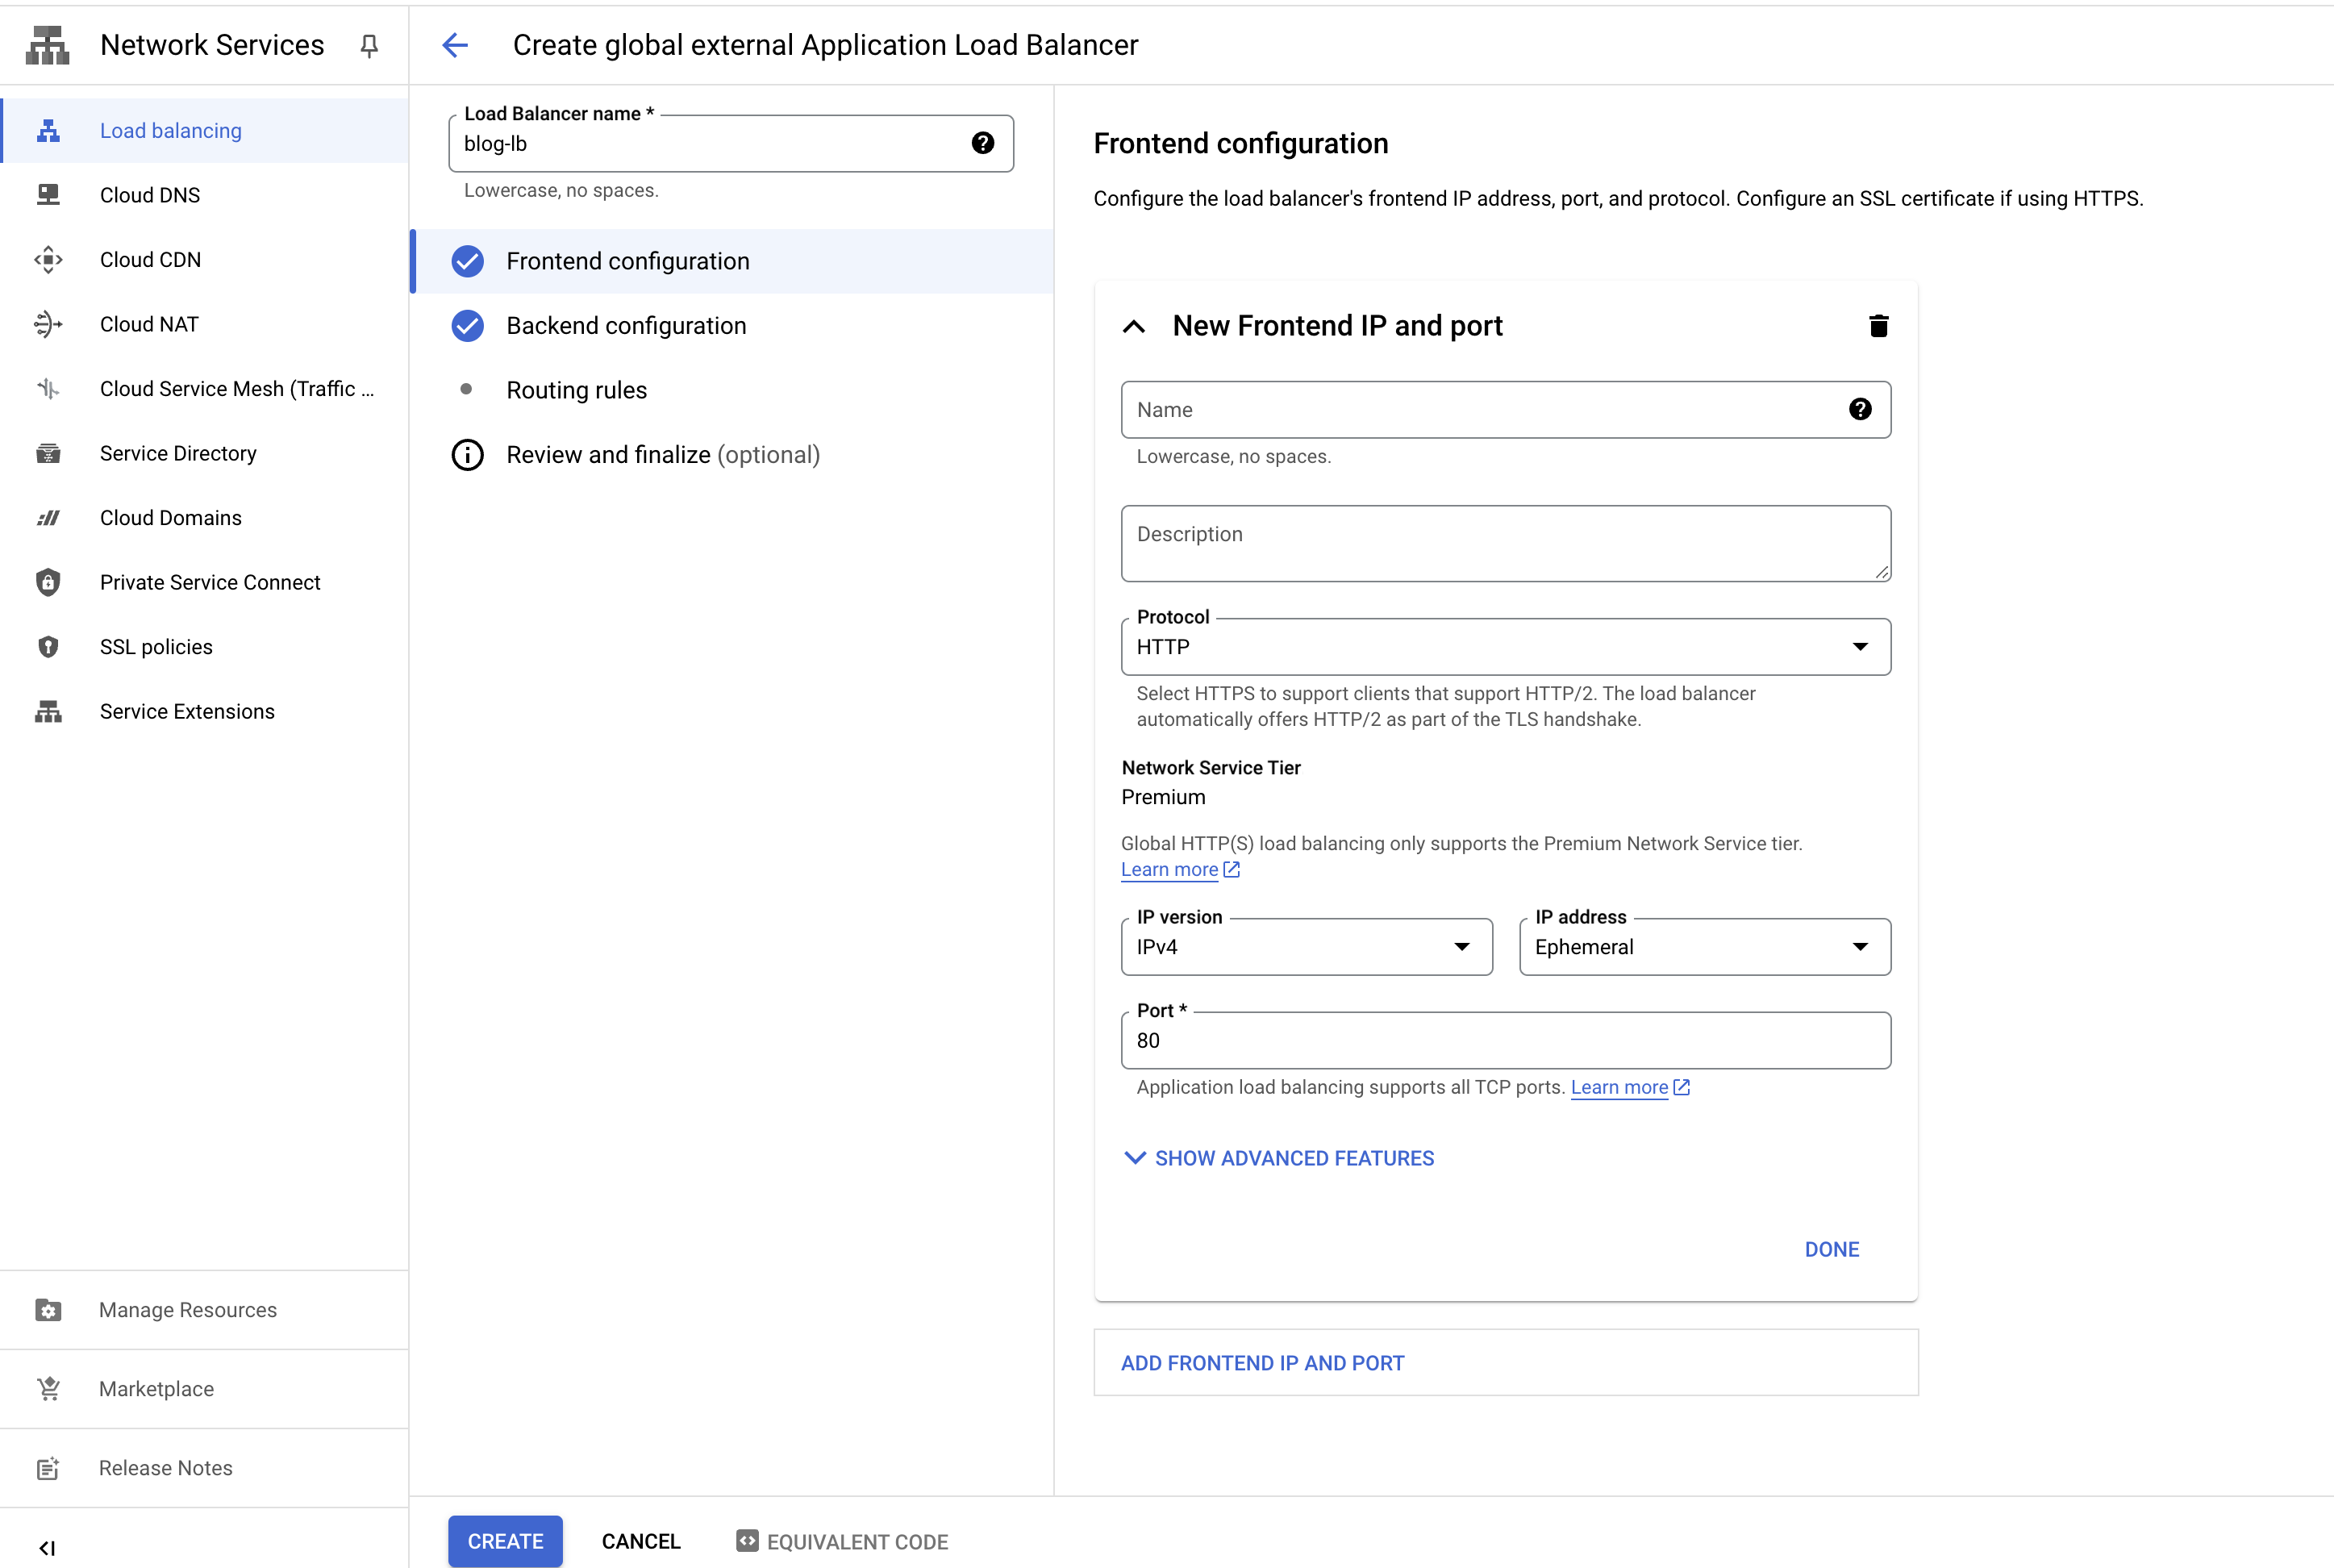
Create a load balancer
Follow the Google Cloud Load Balancer guide.
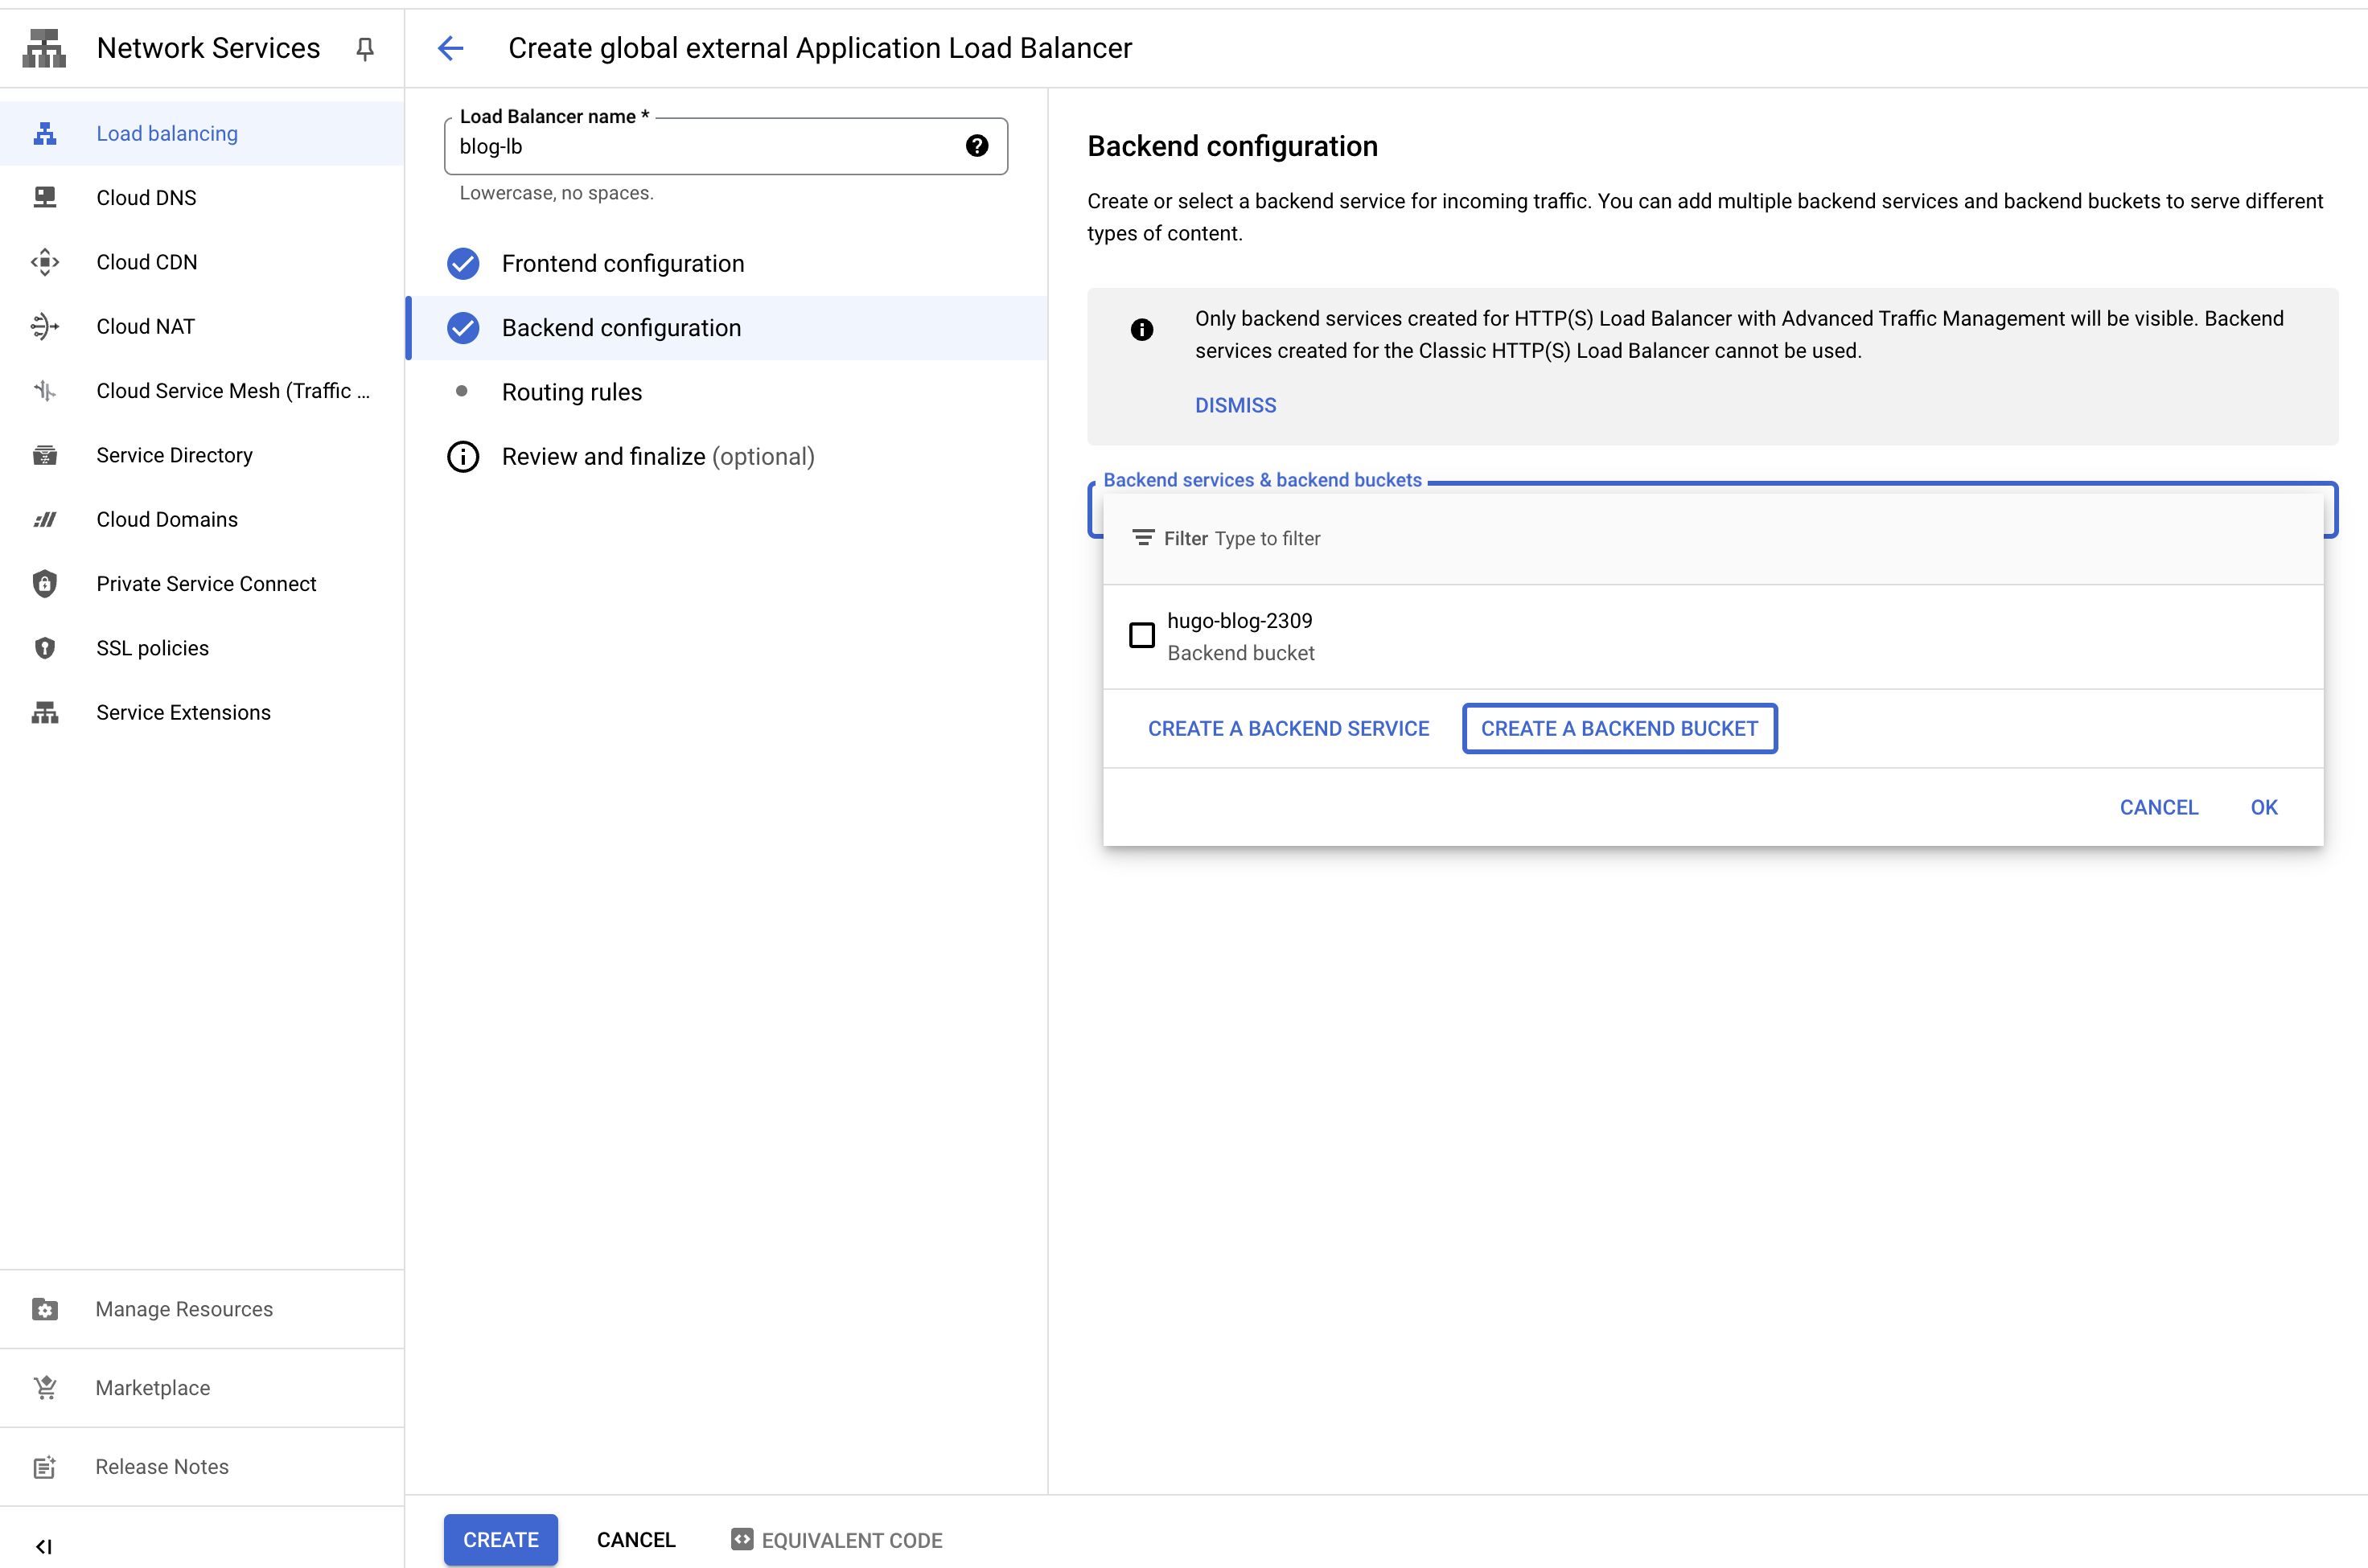
- Go to the Google Cloud Console.
- Click on the hamburger menu in the top left corner.
- Click on “Network services” under the “Network services” section.
- Click on “Load balancing”.
- Click on “Create Load Balancer”.
- Choose “HTTP(S) Load Balancing”.
- Click on “Start configuration”.

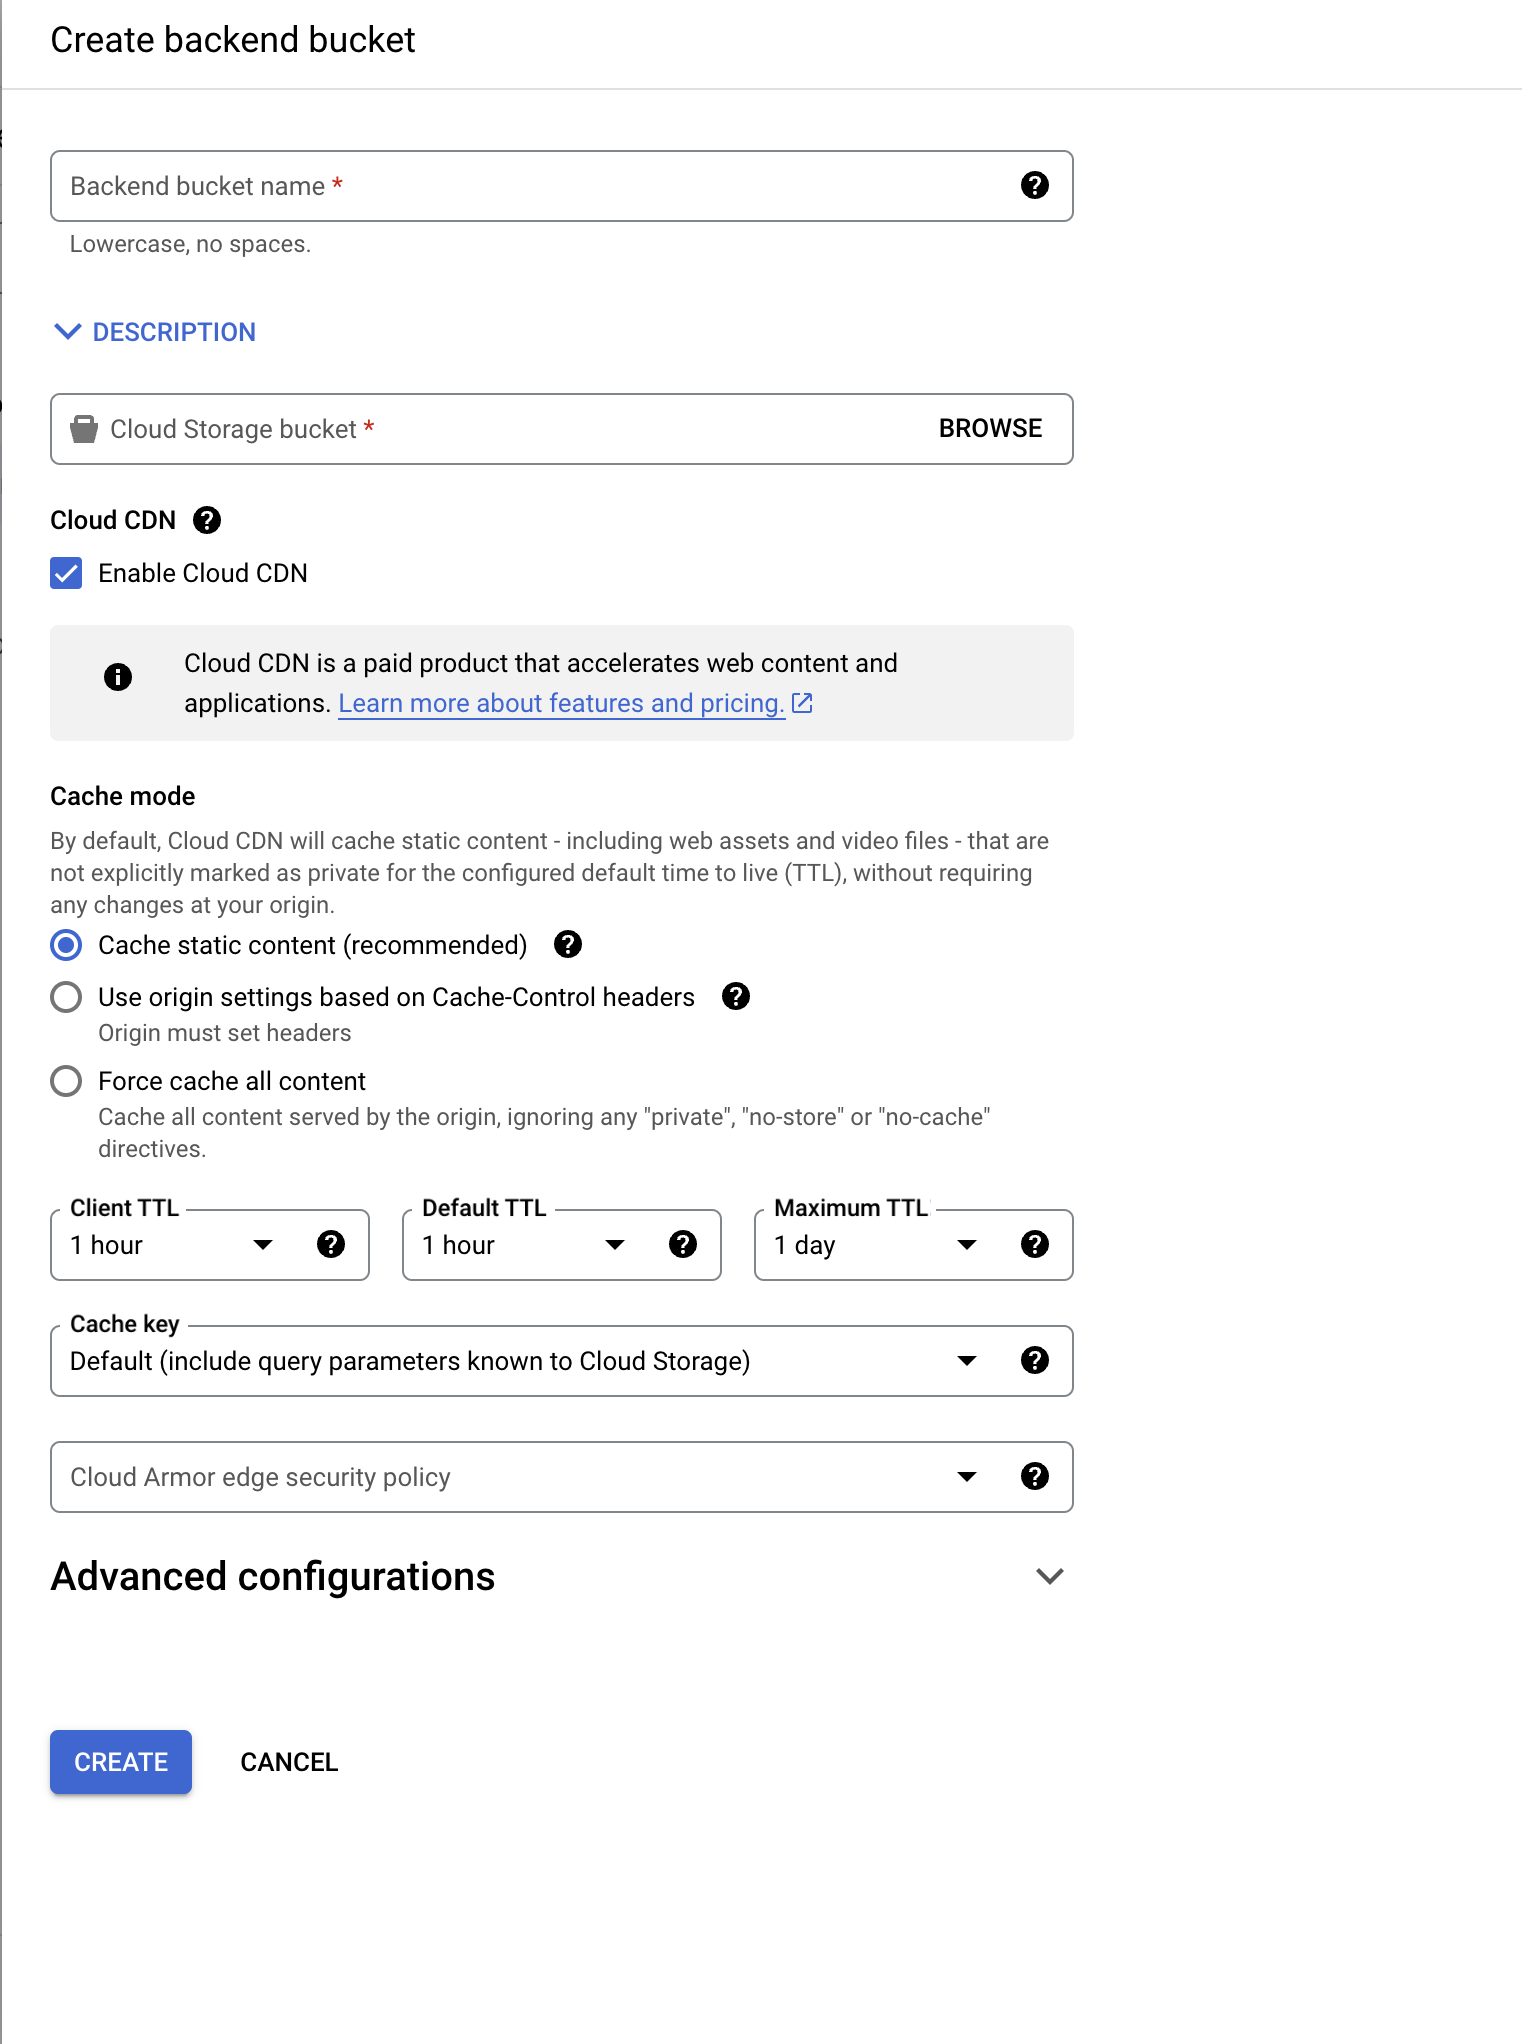
- Fill in the details, configure backend, frontend and click “Create”.
Add a A, CNAME record
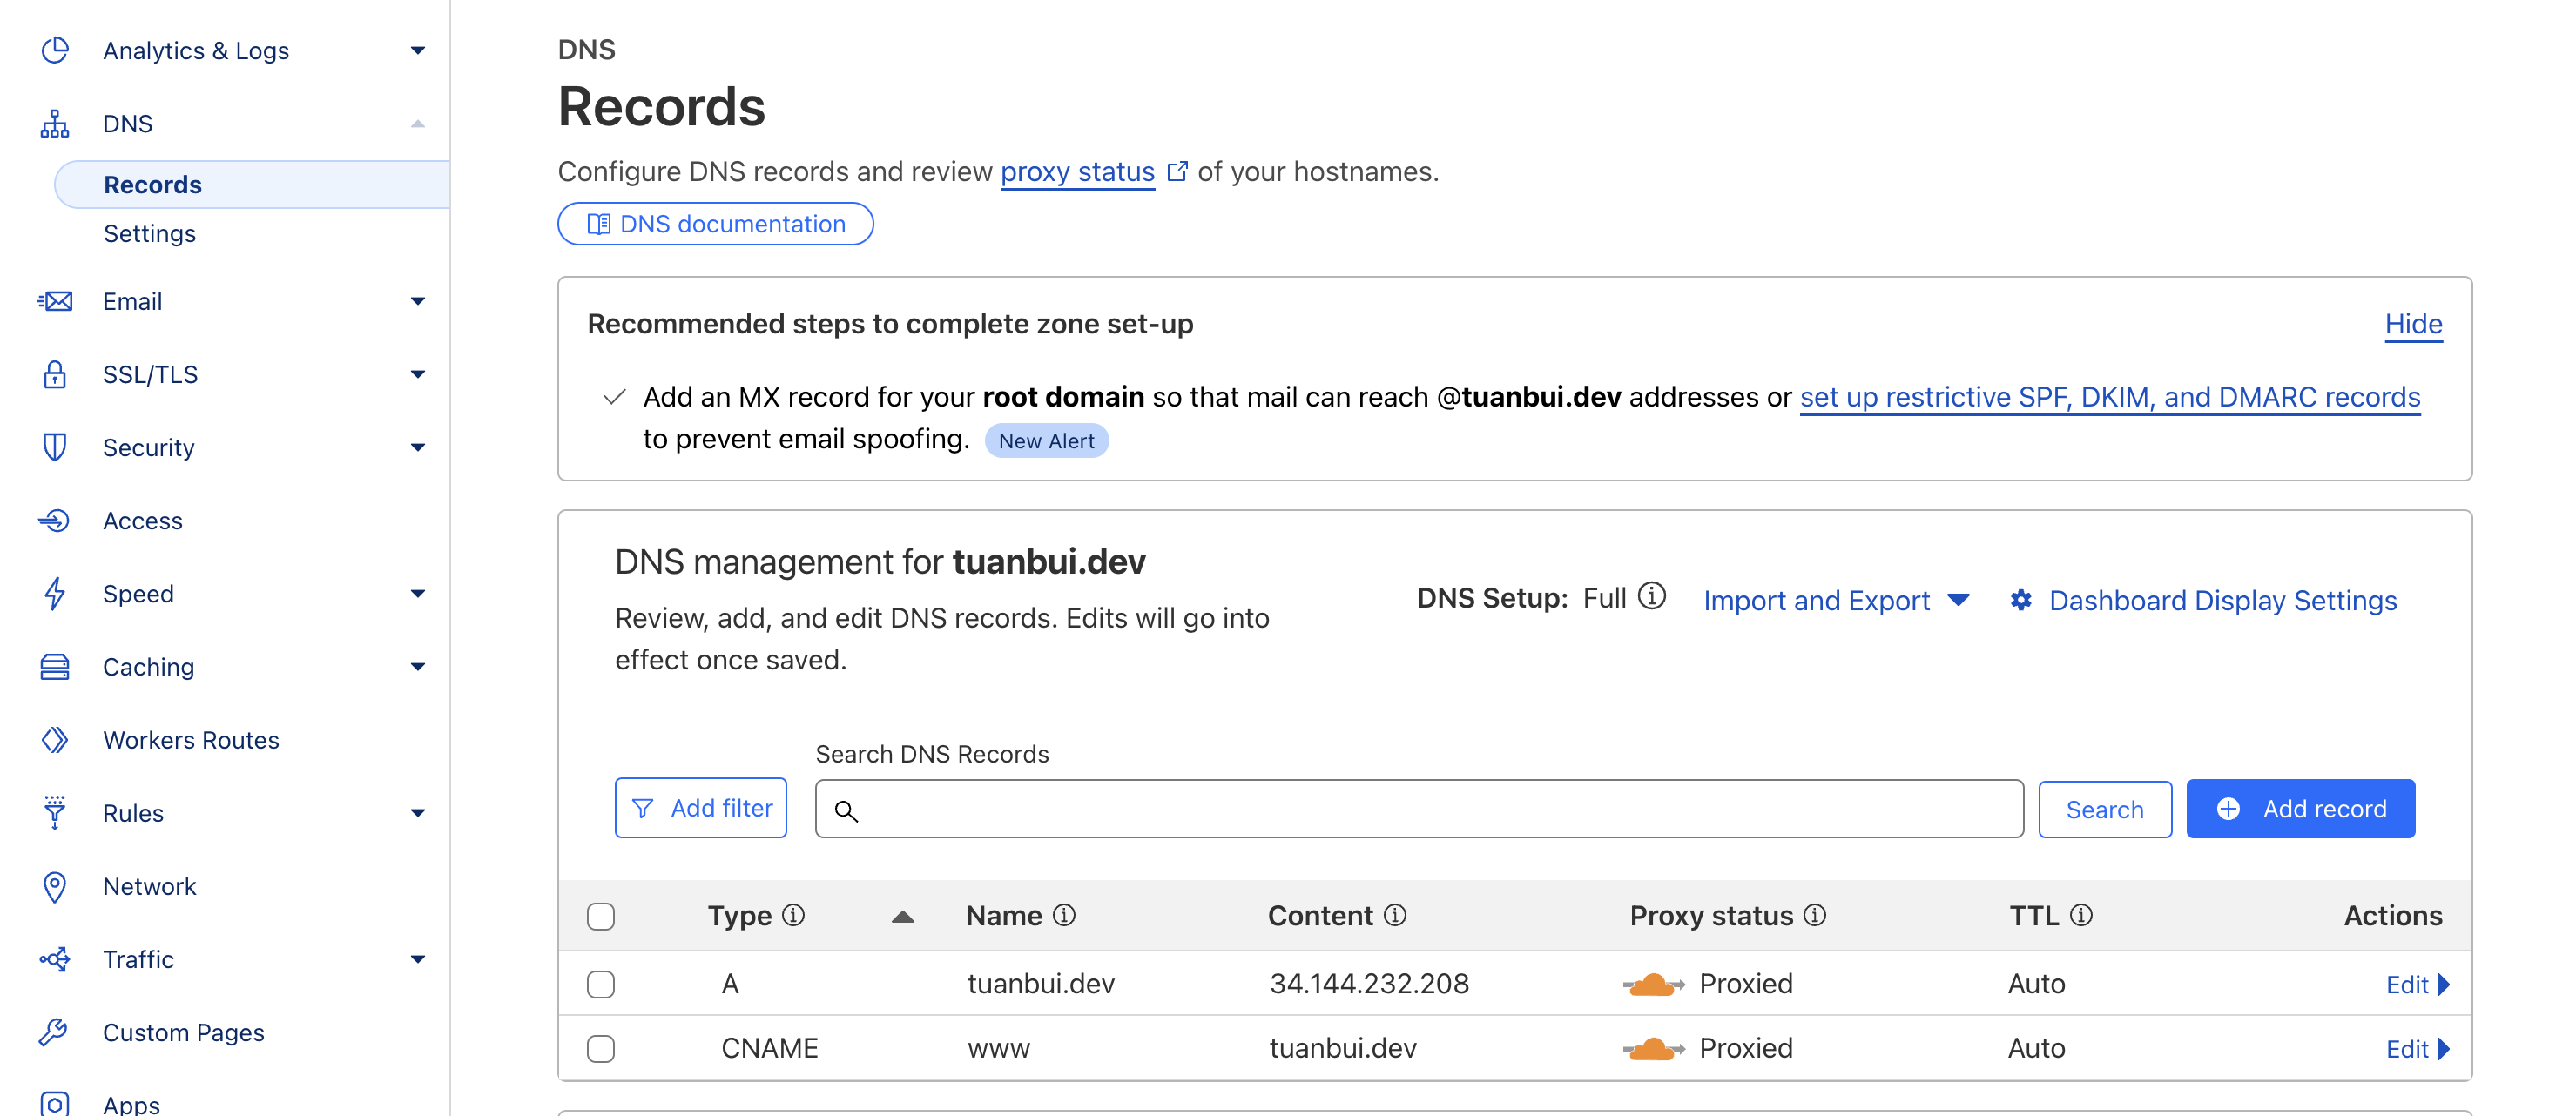
Add a A, CNAME record to your domain pointing to the load balancer.
- Go to the domain registrar.
- Click on the domain you registered.
- Click on “DNS”.
- Add an A record pointing to the load balancer IP address.
- Add a CNAME record pointing to the load balancer domain name.
Test your site
Open your browser and navigate to your domain.
Conclusion
You have successfully deployed your Hugo blog to Google Cloud Storage!